Blab
This is the place where I document things worth writing down but not long enough to make a blog post.
(2026/01/14)
When I was converting my website into the new format, I found that the test I conducted on the 74HC595 was flawed. There are two problems with that test.
The first is that I only loaded one of the output of the 74HC595. Since this IC is typically used to drive a parallel bus of LEDs, I think that I should load all 8 outputs instead.
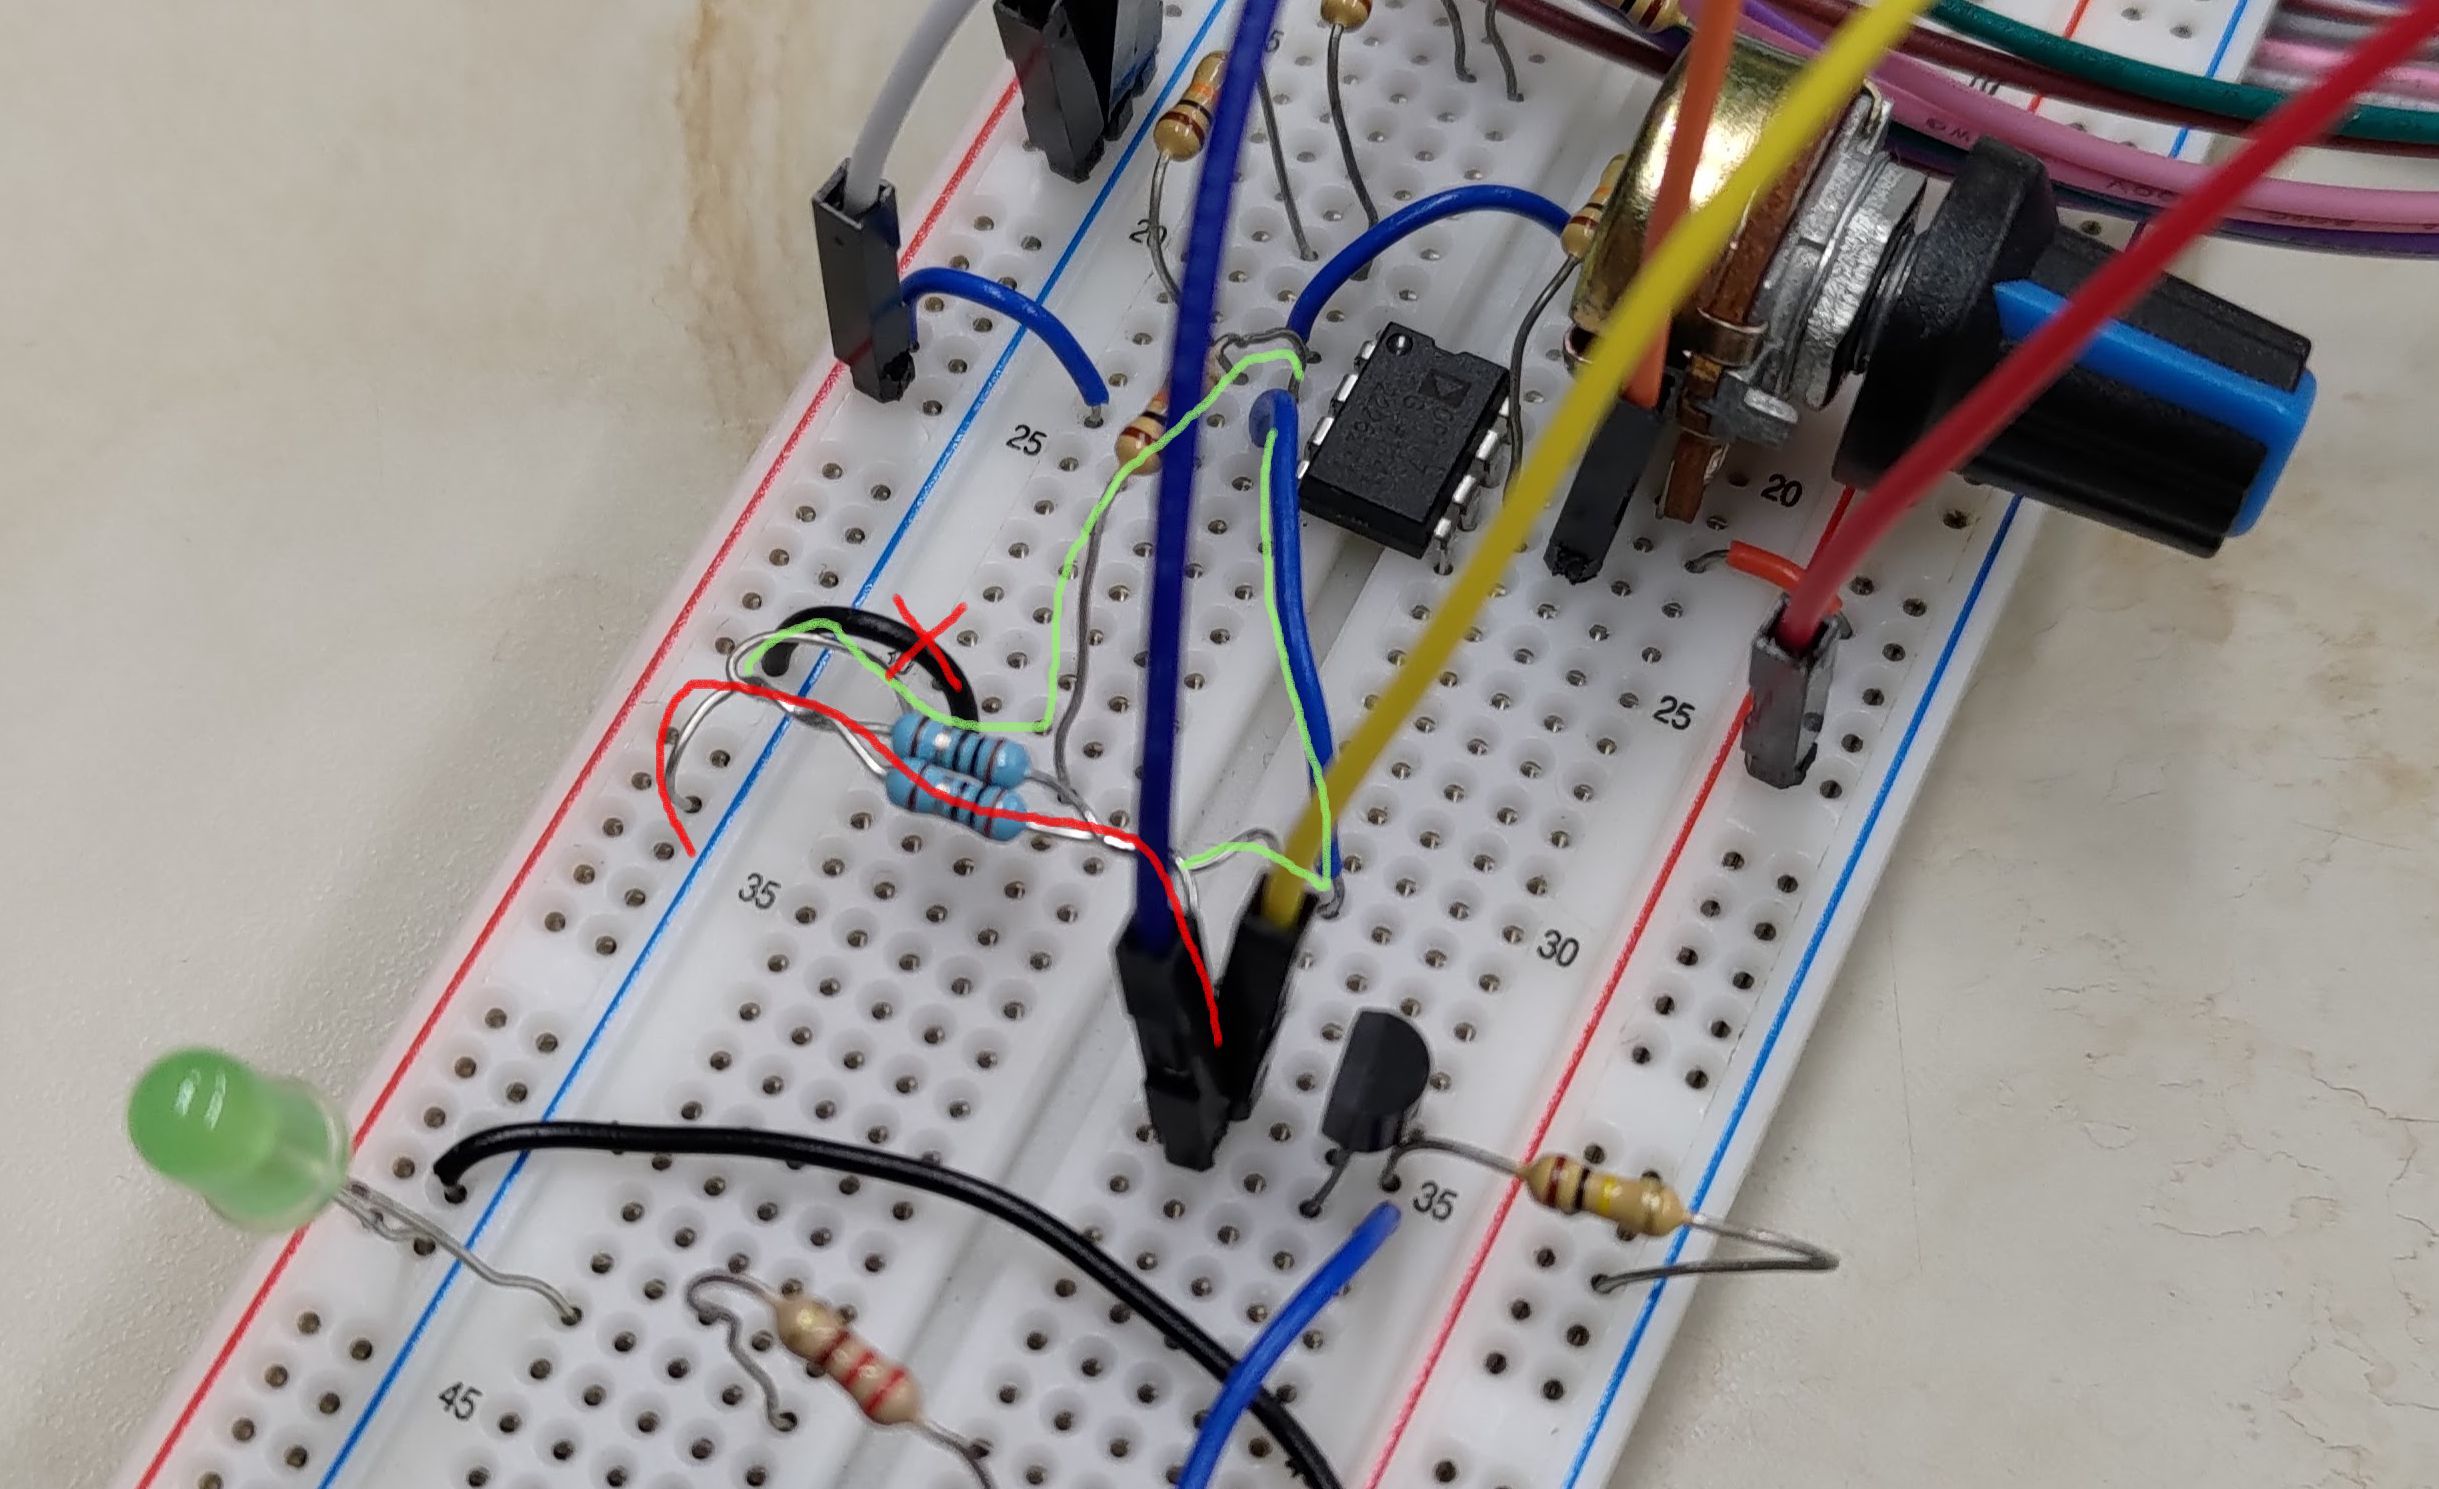
The second is that the Kelvin connection for measuring current was incorrect. The goal of Kelvin connection is to only measure the voltage across the resistor. When the larger current during measurement flows through the lead (drawn in red) resistance and breadboard contact resistance, a voltage will develop and the voltage at the lower end of the resistor will be slightly higher than 0V. By connecting probe (or amplifier in this case) in parallel to the resistor by the soldered second lead of the resistor (drawn in green), we can remove this voltage error from the measurement.
So, what went wrong? I shouldn't connect the crossed out black wire from the probe point to ground, because it will introduce current flow through this black wire and thus the second lead of the resistor will carry a larger portion of current. This means that the Kelvin connection I made is basically useless. However, with the 10Ω resistance during testing, Kelvin connection is probably overkill in the first place. Therefore, the test result is still pretty accurate (as long as you are only using one of the output).
I am planning on doing a test with all 8 outputs loaded, stay tuned!
(2026/01/21)
I was working on the arduino-TMAG5170 library and a nasty bug took me half a day to spot. I typically develop new features on the pico-TMAG5170 with Raspberry Pi Pico SDK, since I am more familiar with that. Then, I port the new code into the Arduino library and test them.
Today, I was porting the continuous measurement example. I found that the very similar code running on the Arduino Uno is much slower than on the Pi Pico. I know that there is large performance difference between the two microcontrollers, but that code was running way slower than anticipated.
It turned out that the attachSPI() function had a bug inside that I didn't spot when I first ported the library.
The bug was: the parameter baudrate was an "int".
Why was this a bug?
Because the C standard only specified the "int" to be at least 16 bits wide.
Although most devices (including the Pico) have 32-bit "int" nowadays, the Arduino Uno has 16-bit "int".
Therefore, I was expecting the baudrate parameter to hold a 32-bit value but it wasn't.
In the example, I set the SPI baud rate to 1MHz, which can be fitted into a 32-bit "int" but not a 16-bit "int".
The most significant 16 bits are truncated, leaving the final value of 16960 Hz.
This explains why the code was running much slower than I expected.
To solve this issue, I changed the type into "uint32_t". By explicitly setting the bit width, the aforementioned problem won't occur. The taken away is, we use types that explicitly set the bit width in an Arduino library to maintain compatibility with different series of microcontrollers.
(2026/03/03)
I was measuring the IV curve of the 74HC595 shift register with an STM32 NUCLEO-G431RB development board. I used the ADC on the STM32G431RB to measure voltages. The ADC is a 12-bit ADC and the STM32 runs on 3.3V. Therefore, I naïvely applied the conversion formula to calculate the actual voltage from the measured digital number: .
However, I looked at the measured voltage and felt weird. I powered the 74HC595 with a pretty accurate 5V supply, how can the measured voltage be 5.03V? I double checked the voltage with a multimeter and it reads 4.95V. Something went wrong during the conversion.
It turns out there is an external reference voltage on the NUCLEO-G431RB board. It is provided by a TL1431CL5T IC and its value is 3.25V! By default the STM32 on this development uses this reference voltage for its analogue peripherals. Therefore, the conversion formula should be instead.
(2026/03/15)
I usually program the Raspberry Pi microcontrollers (RP2040 and RP2350) with Pico-SDK. To use Pico-SDK, we need to setup a CMake project. In every Pico-SDK project, we must include the pico_sdk_import.cmake file. In most tutorials, including the official ones, they suggest to copy this file from the SDK to the project folder. However, there is a way to point CMake to the file in the SDK without copying, provided that the PICO_SDK_PATH environment variable is set. All we need to do is change the import line in CMakeLists.txt.
include($ENV{PICO_SDK_PATH}/external/pico_sdk_import.cmake)
(2026/04/28)
I am talking about Pico-SDK again.
One of the nice part of Pico-SDK is how easy it is to print stuff over UART or USB.
We can directly use the printf() function, just like on a desktop computer.
I am working on testing my gate driver IC today.
I use a Pico to control the input of the gate driver, and the Pico is controlled by a Python script on my laptop.
After the test pattern is completed, the Pico prints some text over USB and I wrote the Python script to check whether it finished successfully.
In the Pico's C program, I use printf("d\n") to print this message.
In the Python script, I use bytes_read == b"d\n" to check whether the test pattern was successfully finished.
I traced the two programs from the start and after an afternoon of debugging,
I found that the message received by the Python script alternates between b"d\r", "\nd" and "\r\n".
A carriage return character was inserted before the newline character.
It turns out that the Pico-SDK by default replaces "\n" with "\r\n" so that it displays better in the terminal.
Source.
Although this behaviour can be disabled, I modified by Python script to check for bytes_read == b"d\r\n" instead.
(2026/06/19)
I got screwed by a counterfeit TL082 opamp. I was building a current sense amplifier and I needed an opamp with high slew rate. As I was testing the amplifier, I found that the output cannot catch up with the input. So, I decided to measure the slew rate of the opamp.
I connect the opamp as a voltage follower and powered it with ±15V. I feed the input with a 1kHz, 1Vpp square wave from my Analog Discovery 3 and measured the output. It turns out instead of the 13V/us on the datasheet, I got 0.58V/us.
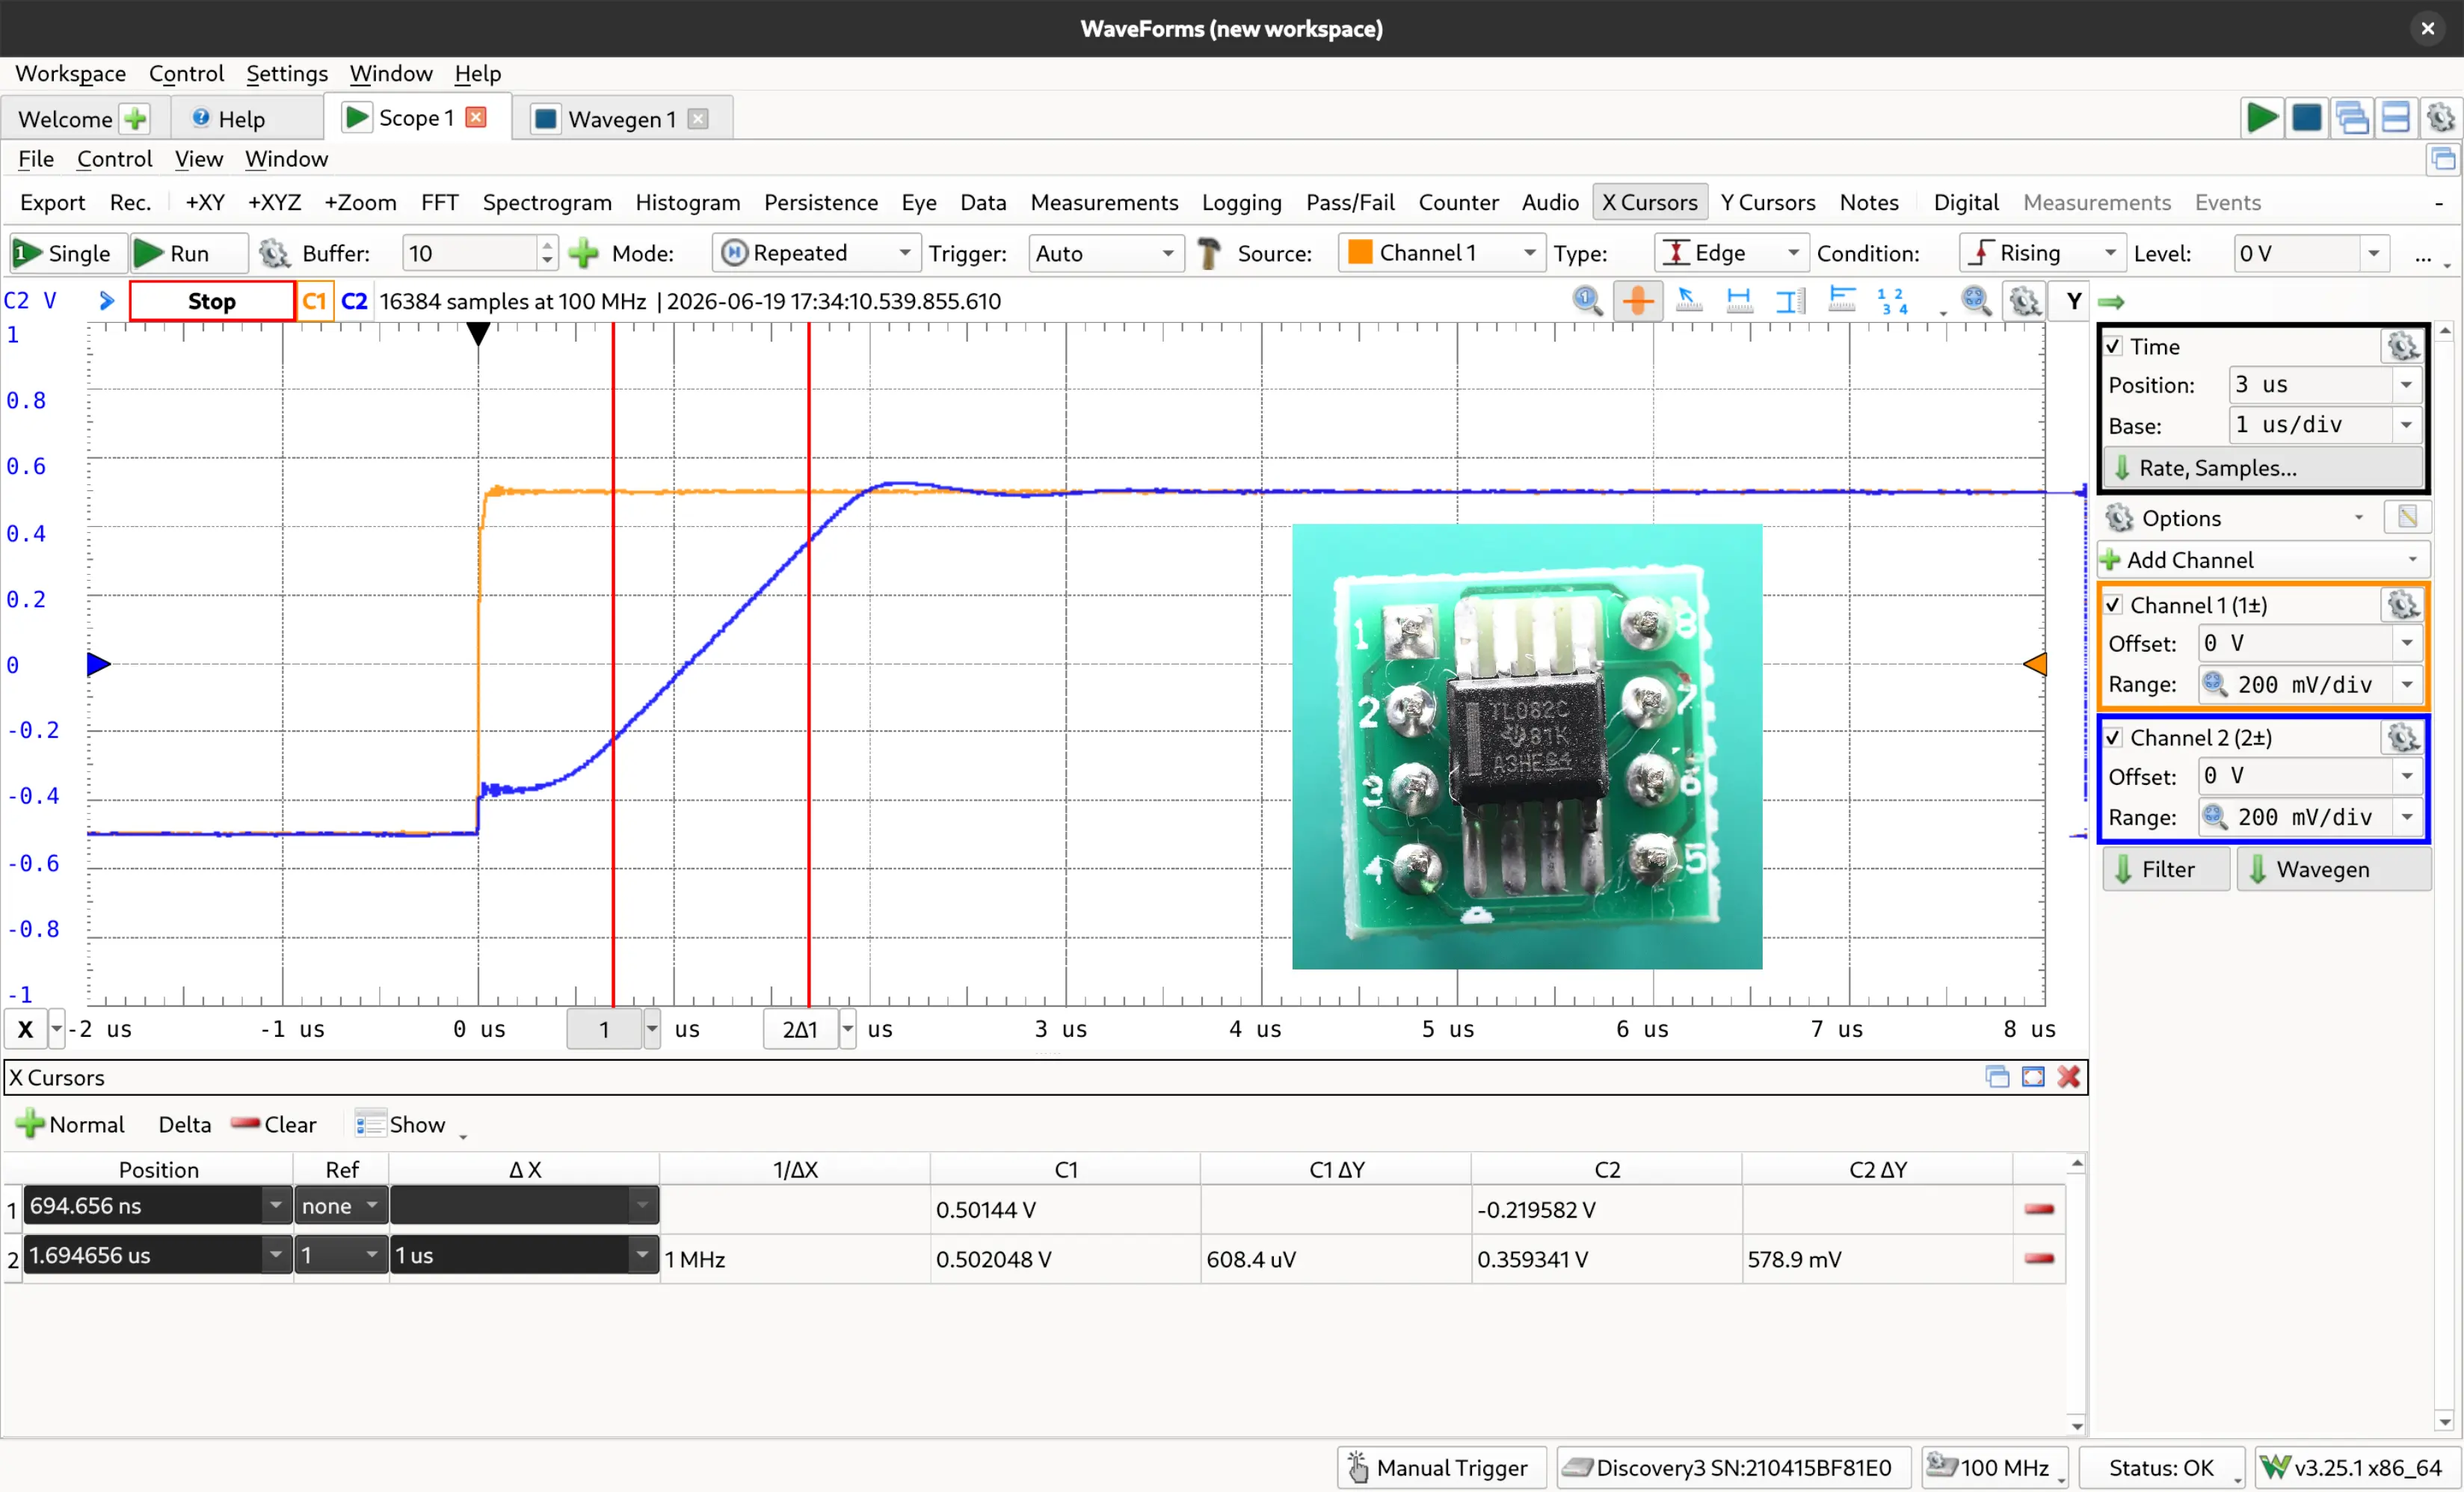
The folks on EEVblog forum figured out that it should be an LM358 disguised as a TL082. I never thought I would be scammed by such a jellybean part. Now, I need to buy a proper high slew rate opamp.