How to un-brick an STM32?
I accidentally bricked my STM32 when uploading compiled binaries to it. I used a Raspberry Pi Pico 2 and the official CMSIS-DAP firmware with OpenOCD. After some messing around, I found the way to un-brick it and how to prevent bricking.
Why was it bricked?
I was too eager to get my code up and running on the STM32, so I only did minimal configuration in STM32 Cube MX. I'll us a simplified project to demostrate, blinky. Let's say we want to blink the LED on PC13. To finish setting up as soon as possible, we only changed the GPIO setting of PC13 in Cube MX. All other pins have the default value as generated by Cube MX.
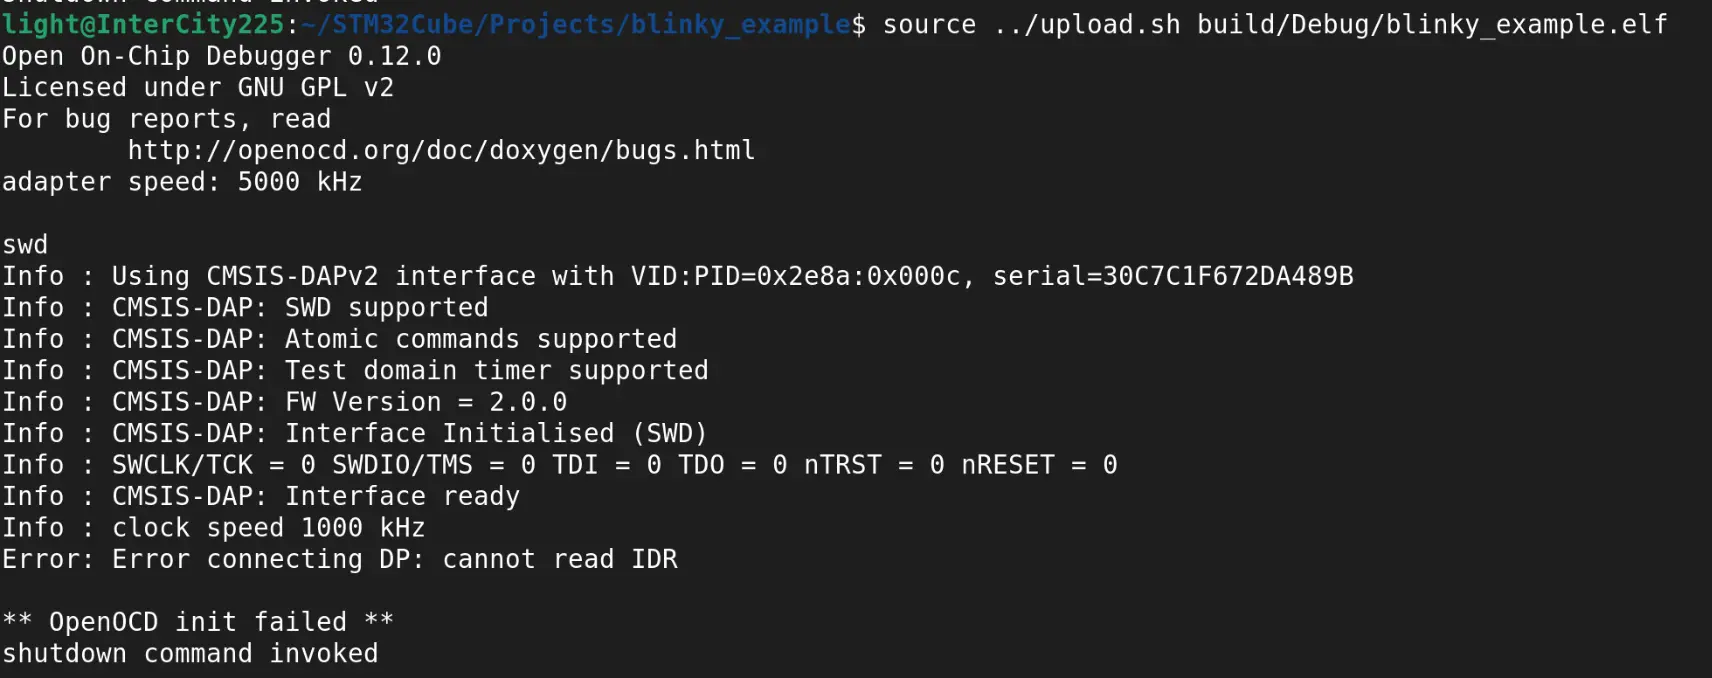
After compiling and uploading the binaries to the STM32, we want to change something in the code. However, we are met with an error message when uploading to the STM32. This is because we forgot to enable the Serial Wire Debug (SWD) interface in Cube MX. Since we are uploading through this interface, without it enabled, the STM32 will seem "bricked".
Un-bricking procedure
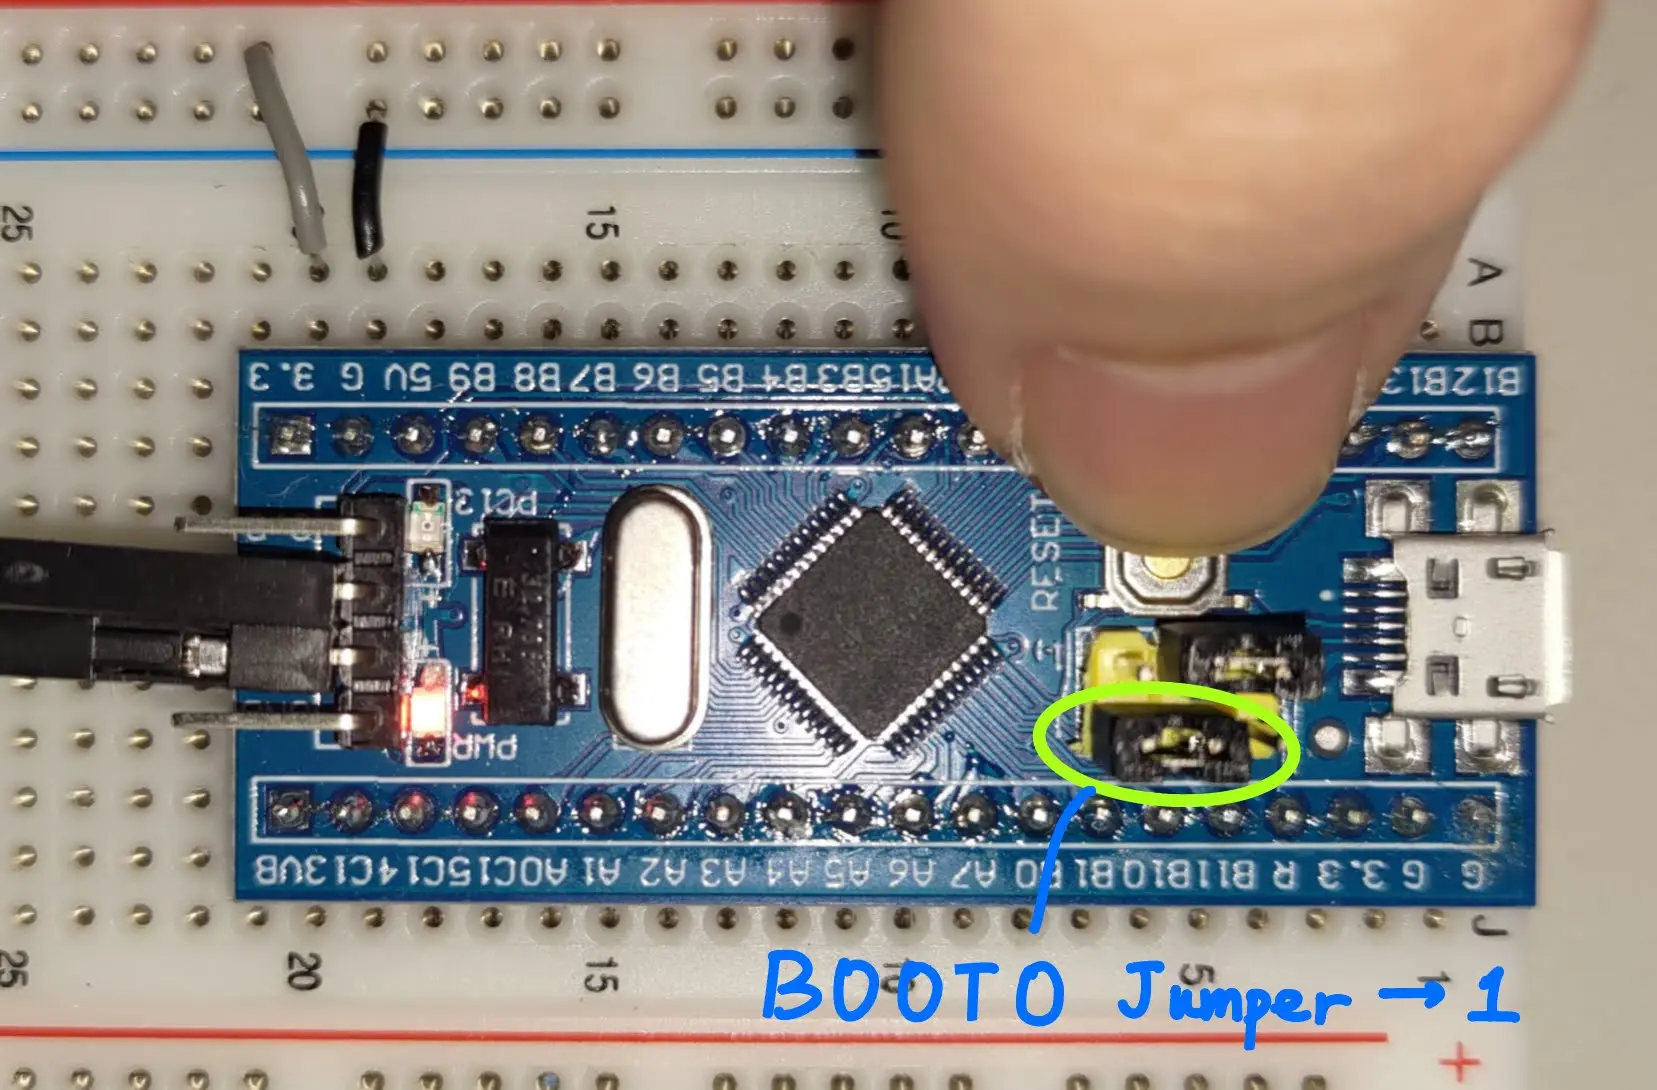
Connect BOOT0 to VDD, power up the STM32 and press the reset button, the STM32 will start in bootloader mode. Then, use SWD to upload your code. The uploading process will be successful.
How to prevent this?
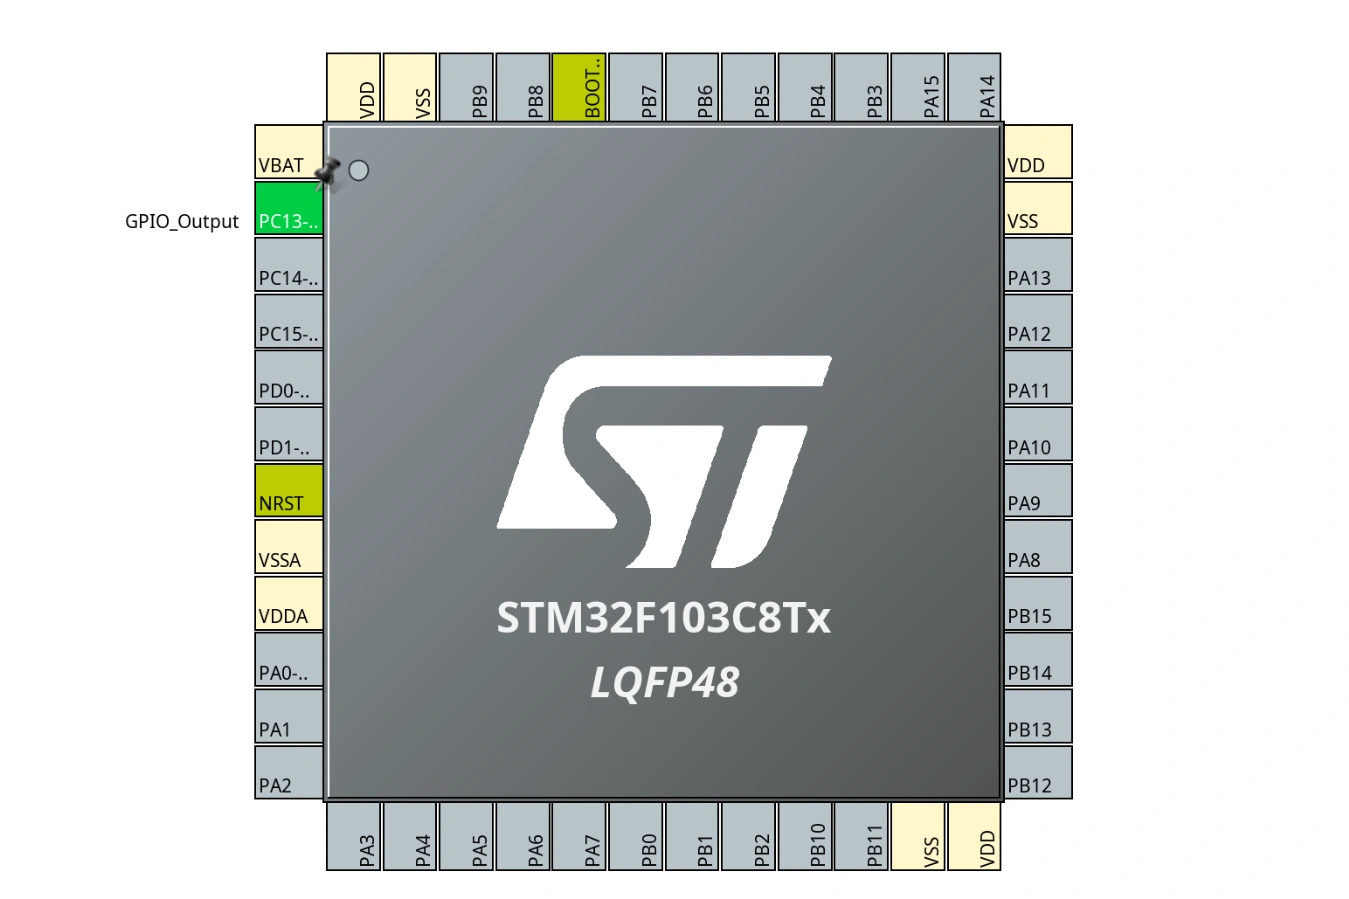
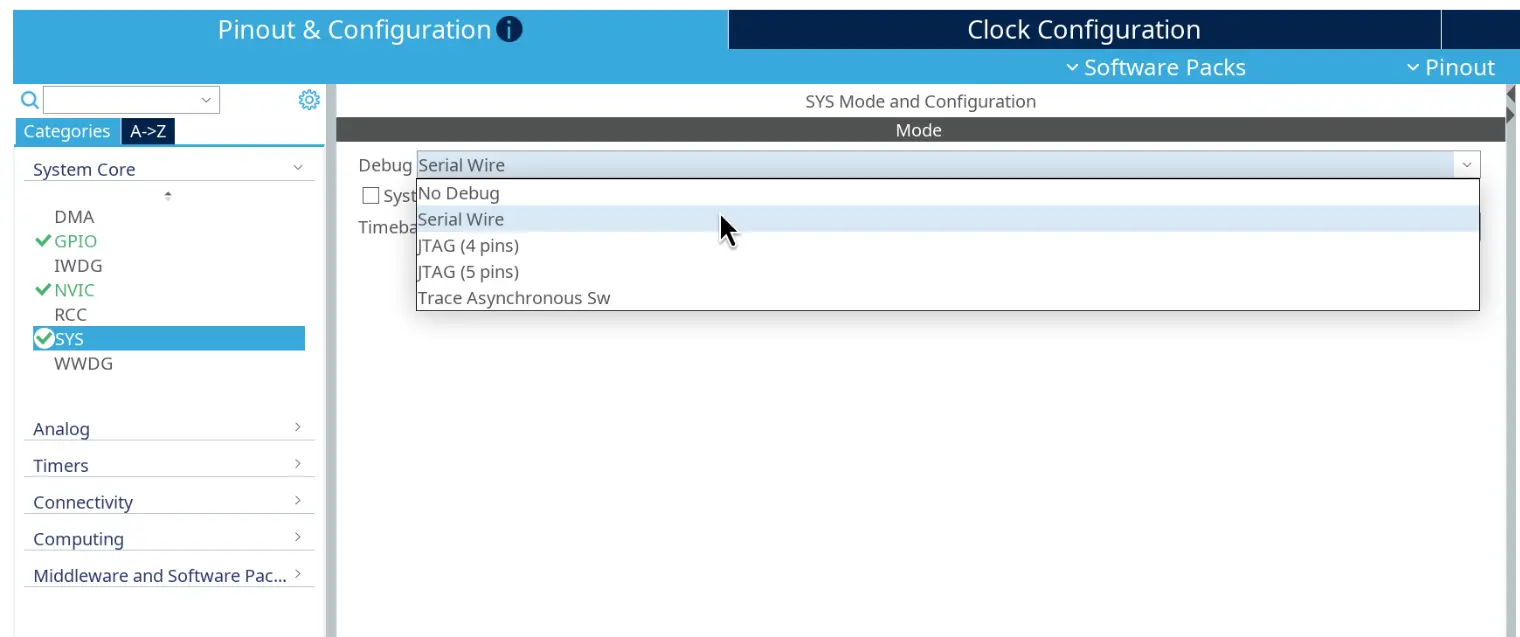
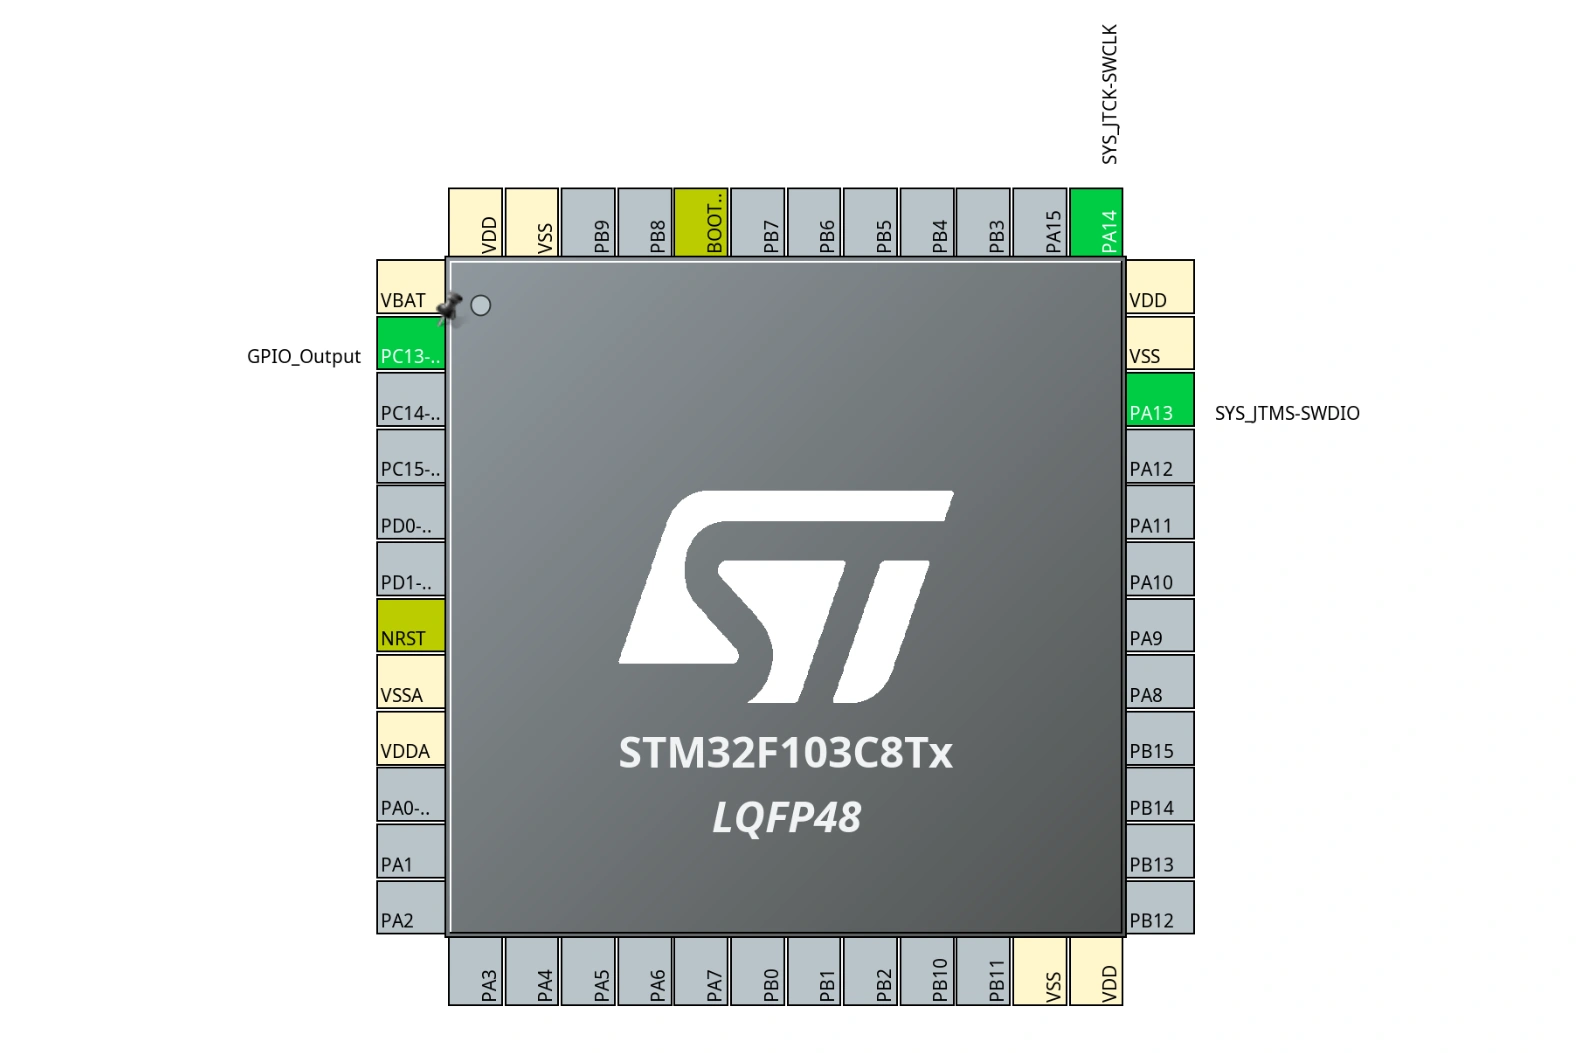
When setting up the STM32 in Cube MX, remember to enable SWD. Go to System Core > SYS on the left hand side menu and enable Serial Wire as the debugging interface. After this is set, PA13 and PA14 should be coloured in green. This is because these two pins are the SWD interface on the STM32F103.
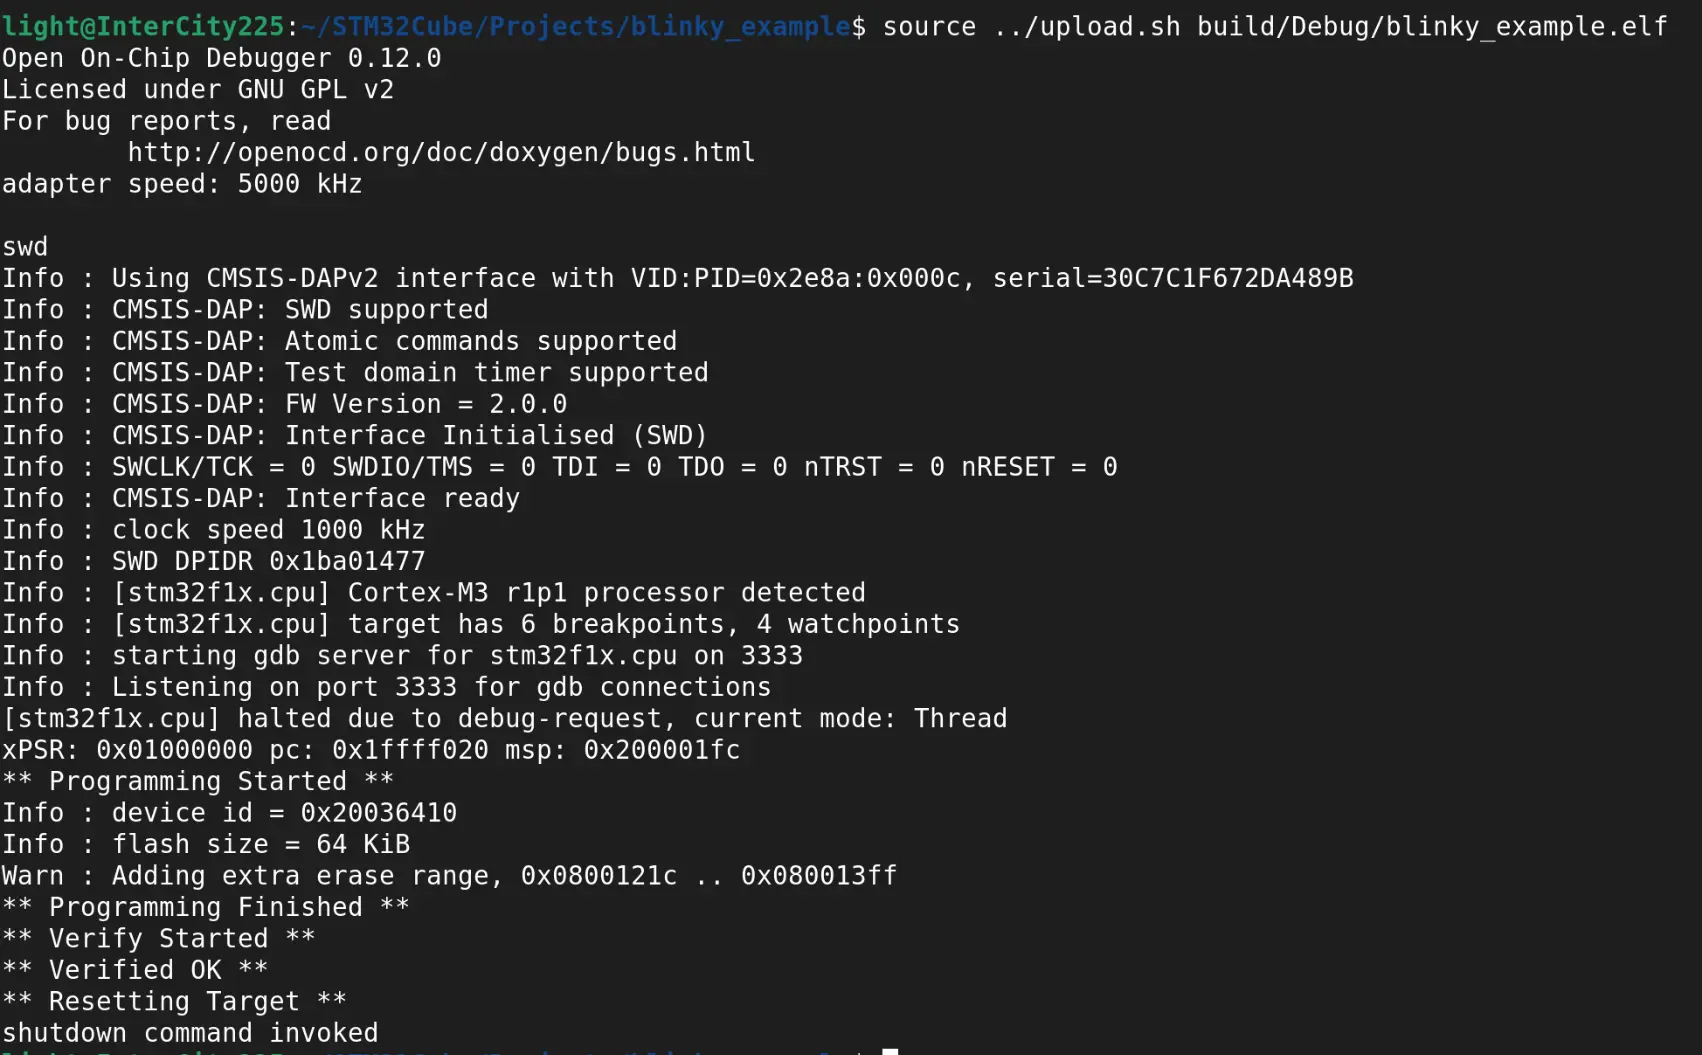
With the correct SWD interface settings, we will be able to upload binaries to the STM32 normally again.