USB 3D Gauss Meter
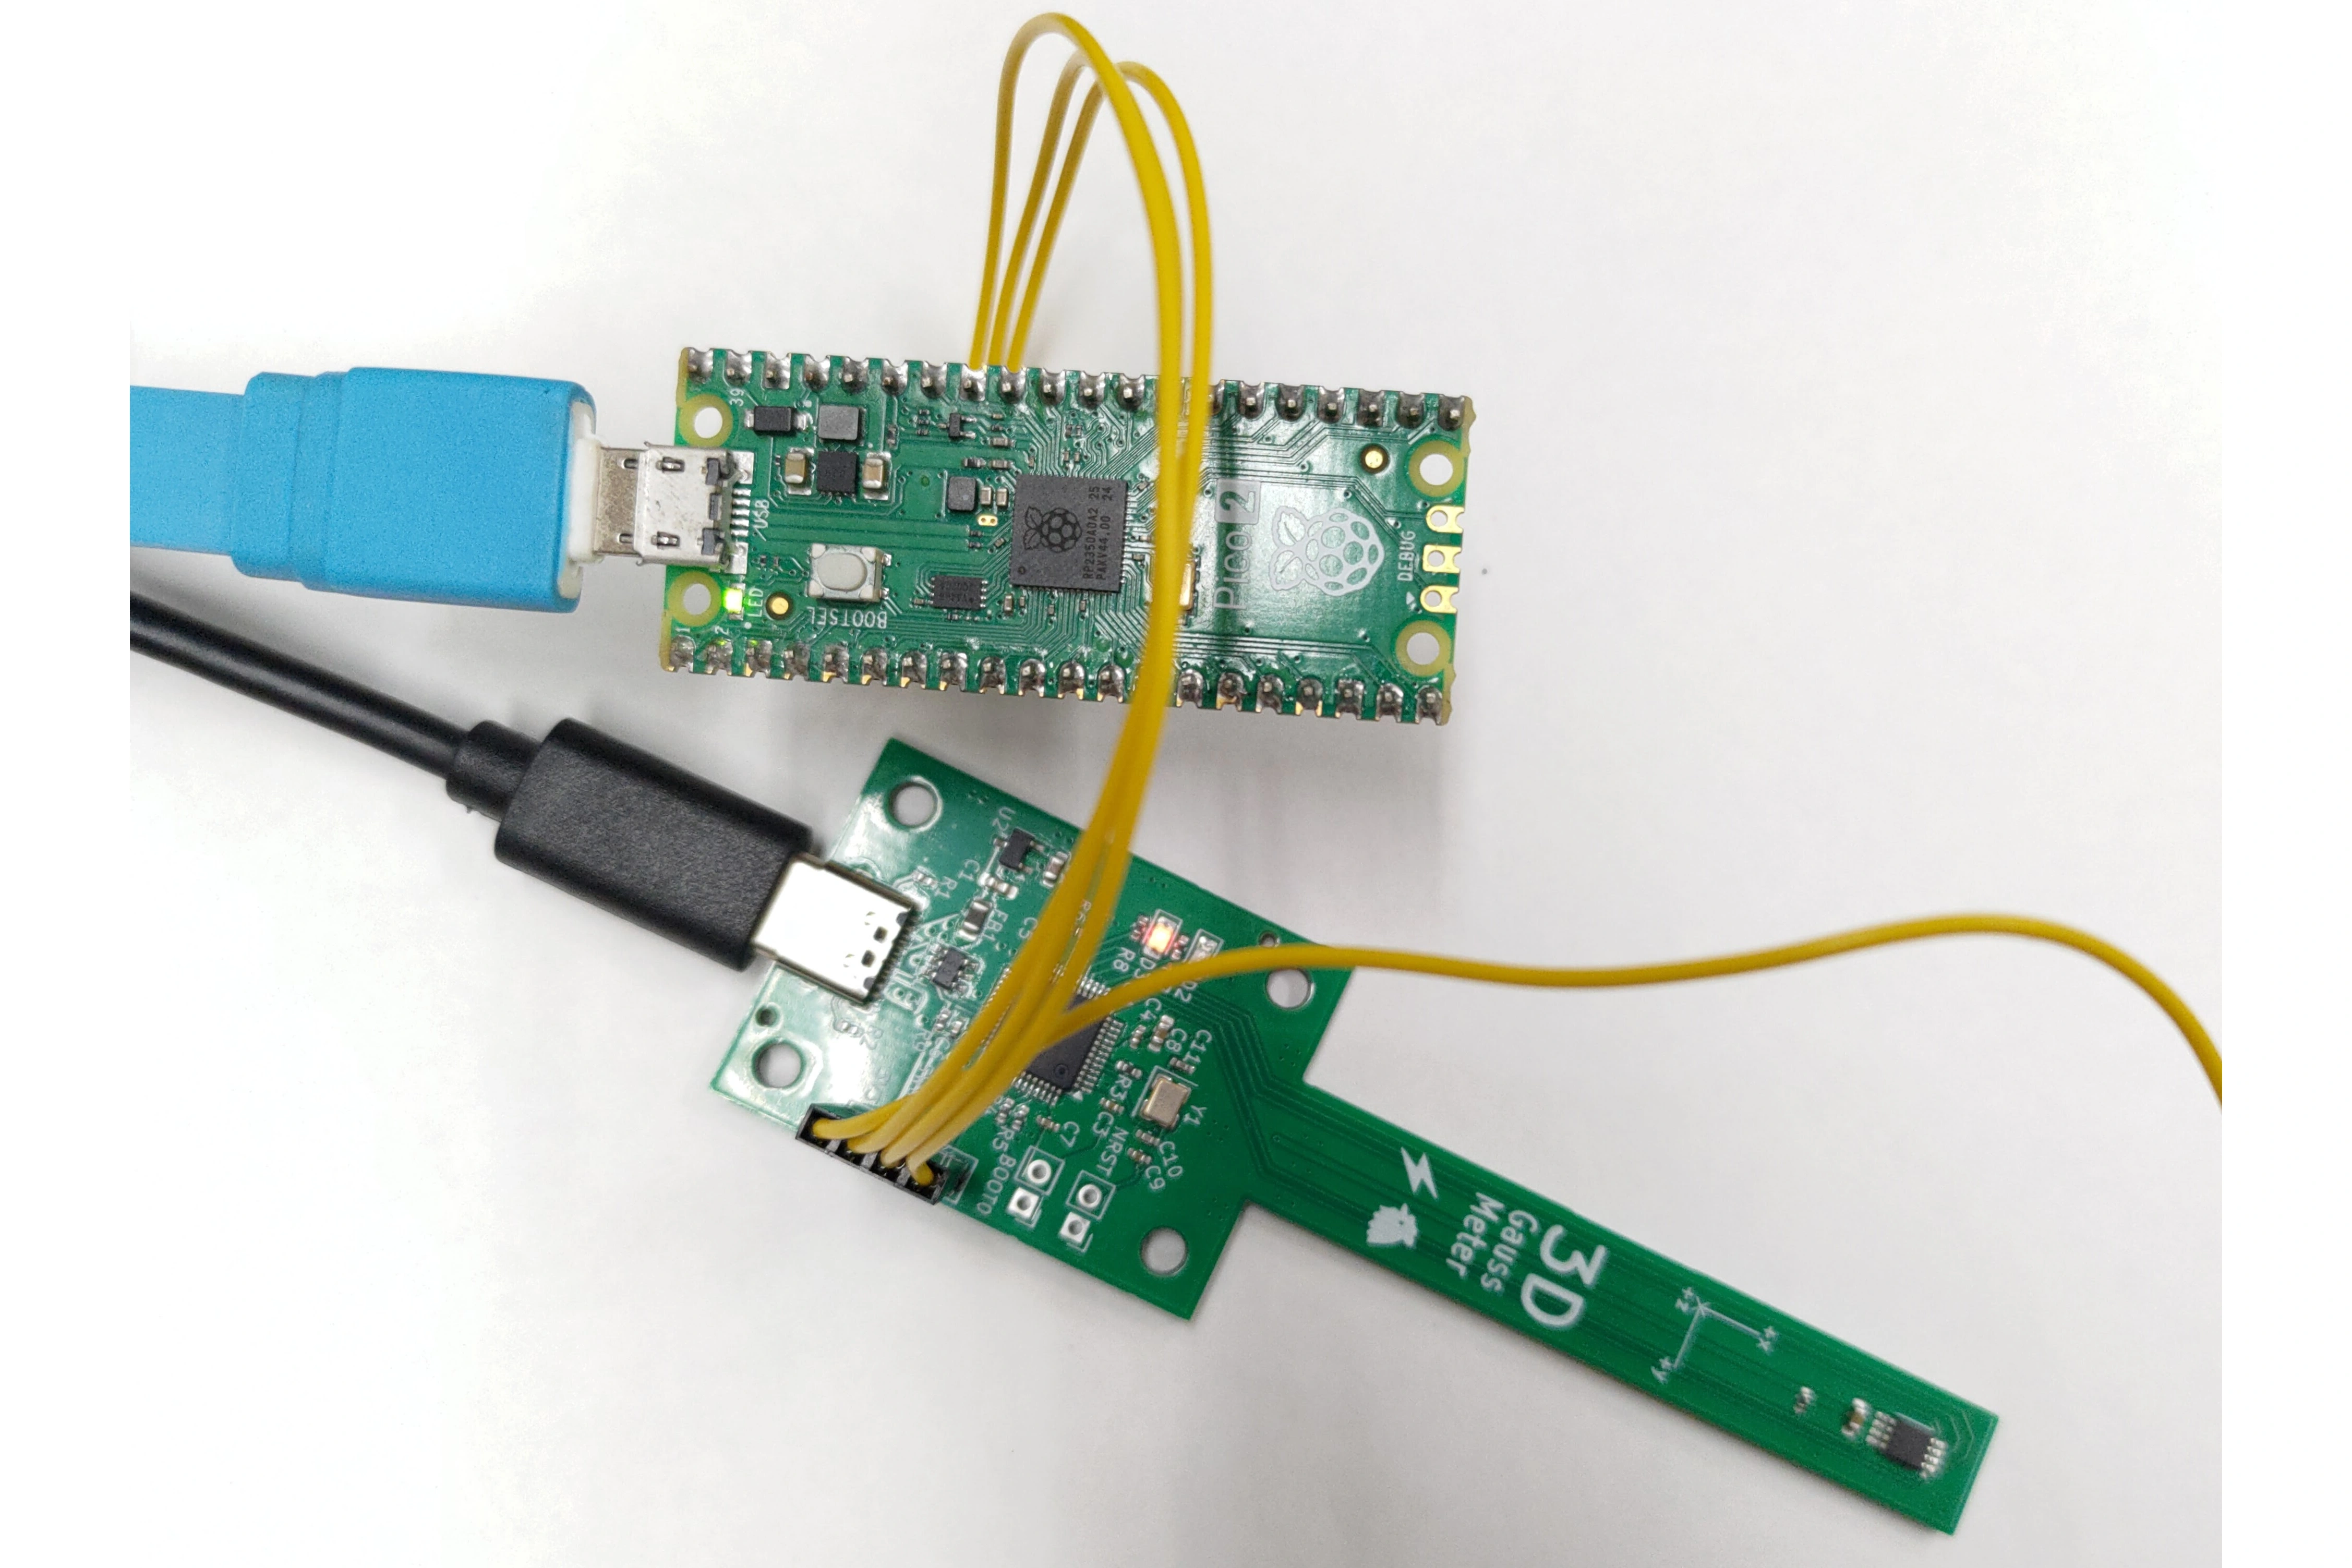
This project is a USB 3D-Gauss Meter based on Texas Instrument's TMAG5170 Hall Sensor. The Gauss Meter is powered by an STM32, which sends the measured data through USB. There is a Python GUI client to show and log the measurements on your computer screen. All of the hardware design, firmware and Python client source code are available on Github. A setup and demo video is available here.

Python GUI client setup
For users with Python installed on their computers:
The Python script of the Python GUI client can be downloaded from the Github Release Page.
The gauss-meter-python-gui-client-v2.0.0.zip file contains the Python script and the list of required packages.
This is intended for users who have Python already installed on their computers.
The Python GUI client requires Pyside6 and pyserial packages to run. You can install them with pip.
pip3 install -r requirements.txt
Then, you can run the Python script to start the GUI client.
python3 gauss-meter-v2.py
For Windows users without Python:
I compiled the Python GUI client with Nuitka for Windows x86 systems.
The compiled binaries can be downloaded from the Github Release Page.
The gauss-meter-windows-compiled-v2.0.0.zip file contains the compiled binaries for Windows x86 systems.
This is intended for users who does not have Python on their computers.
Unzip the downloaded file and you can find gauss-meter-v2.exe.
Run this file to run the Python GUI client.
Python GUI client usage
First, select the serial device. The USB 3D Gauss Meter should show up as STM32 Virtual ComPort. Next, you can select the measurement range. There are three options: 75mT, 150mT and 300mT.
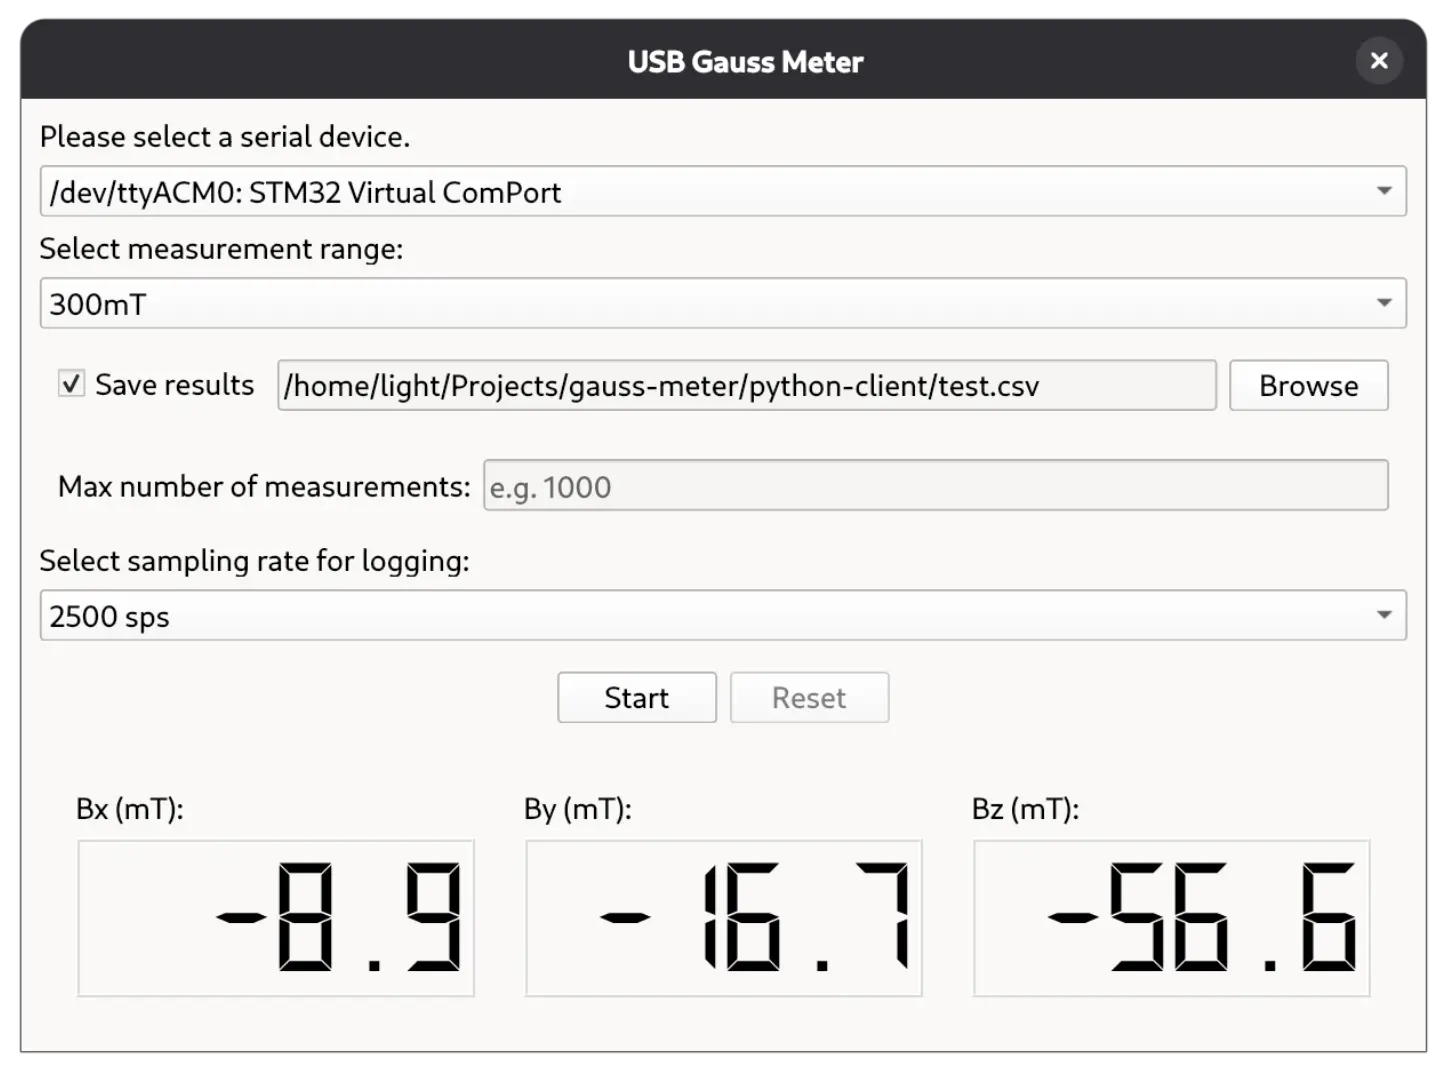
If you want to log to measured data, please check the "Save results" checkbox and select a file to save to. By default, logging will stop after 1000 samples are taken. If you want longer logging length, you can enter the number of samples that you wish to log. There is no limitation to the number of logged samples, as long as your hard drive can fit the data. Next, select a sampling rate. In the current version, the maximum logging sampling rate is 2500 samples per second.
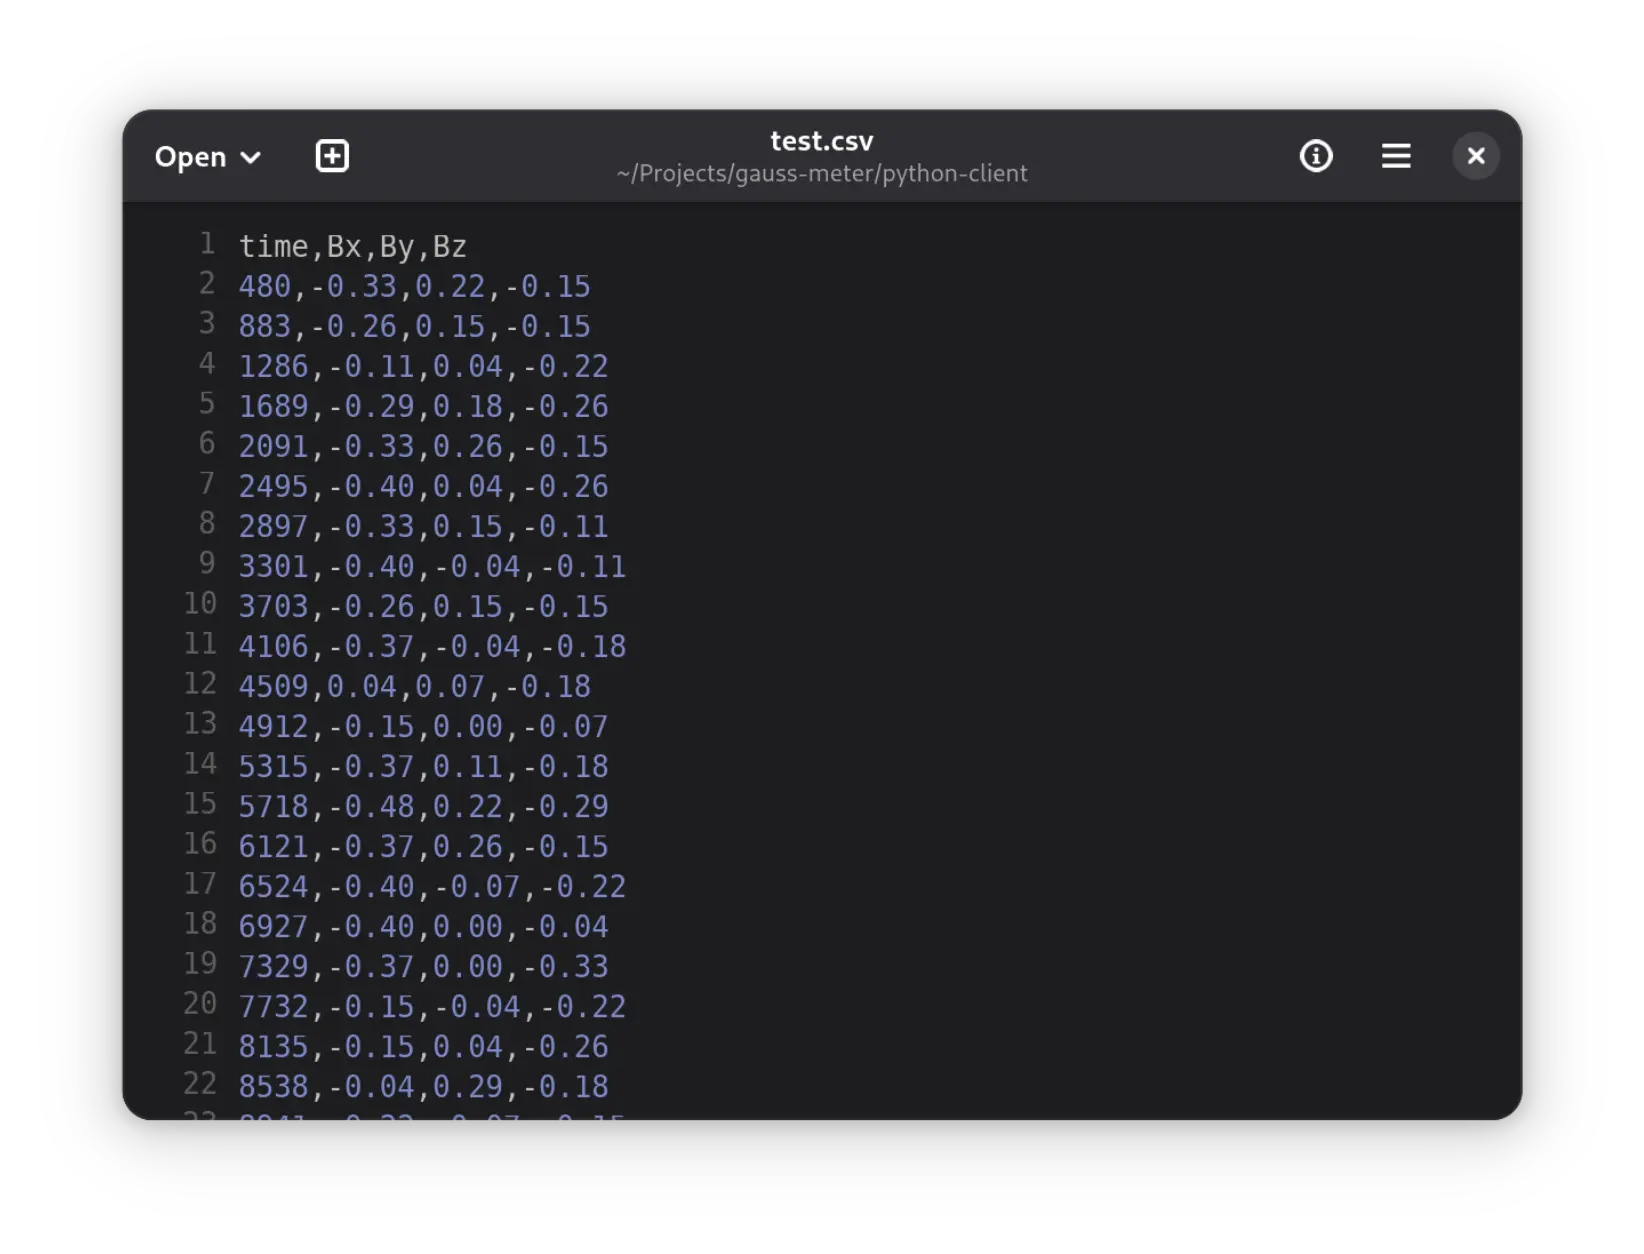
In logging mode, the program will produce a CSV file. There are four columns in the CSV file: time and magnetic field on the three axes. The units are microseconds (us) and millitesla (mT) for time and magnetic field, respectively.
To start logging or just displaying measured magnetic field on the screen, click the "Start" button. The program will stop logging when the set number of measurements is reached. In display mode, the TMAG5170 is set to 32x averaging mode and a measurement is taken around every 0.5 seconds. To force stop and change settings, you can click the "Reset" button.
STM32 firmware
There are two versions of firmware currently. Please use version two firmware with version two Python client. The USB 3D Gauss Meter is loaded with the version two firmware when shipped. You need not flash it yourself.
However, if you decide to hack around with the firmware (you are very welcomed to do so), you can upload it via the SWD headers. You can use any SWD compatible debug probes, such as Raspberry Pi Picoprobe to program the STM32. The SWD headers are arranged in a zigzag footprint. This way, you can insert pin headers without soldering.
The current firmware cannot run at the maximum speed of the TMAG5170 Hall effect sensor. I suspect this is due to the use of C++ in the firmware.